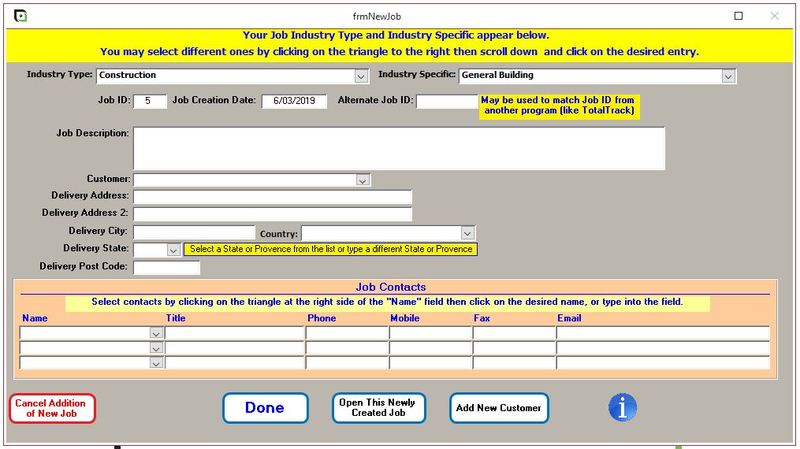
This is where you enter in details for your job. Job contacts are linked to the selected customer. You may also enter in site contact details for someone who may not work for or be related to the customer.
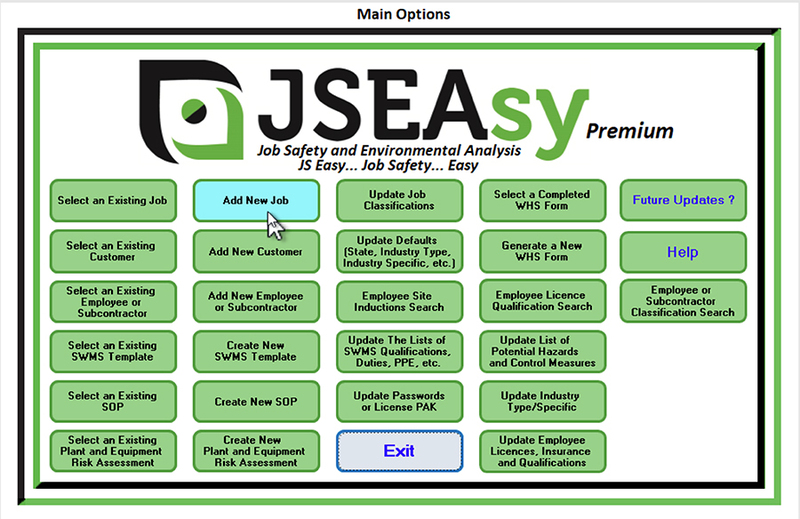
From here you create your site specific JHA (JSA, JSEA, JHA) as well as WHS (OHS, OSH) Forms that are job related.
Alternate Job ID:
If you use job IDs or Job Numbers in your accounting or Project management software, you can enter in a alphanumeric job ID into this field. If you fill in this form, All reports and job related forms will use this job ID/ Number. IF you leave this field blank, the JSEAsy allocated job ID will be used (Job No. 5 in the screenshot above)
Job Description:
A description of the works to be undertaken. This will be used in various site based WHS forms in the Premium versions
Customer:
Select an existing customer from your list of customers. If this is a new customer add a new customer by clicking the “Add New Customer” button at the bottom of the form
Delivery Address:
The clients default address will automatically populate the delivery fields. You will need to overwrite these details with the particular site address for the project if it is different to the clients principal place of business
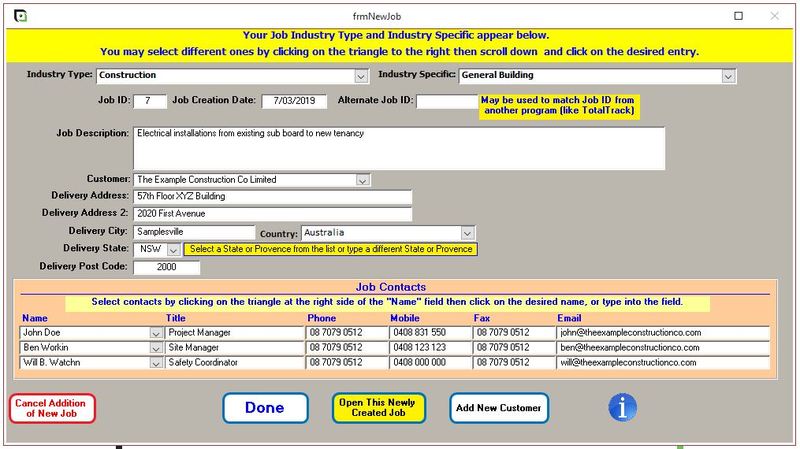
Done
This will take you back to the main options. To find you job from the main options click on Select an Existing Job
Hint
Select or add up to 3 contacts for the job. This will appear on your site specific JHA (JSEA, JSA, JHA)
The first line of the delivery address could be something like, “First Floor ABC Building” and the Second line “123 First Street”
Done